Pages

Sunday, November 30, 2014

Christmas Cards

    This year I made a few varieties of Christmas cards, once again.  I used to find one stamp set I liked or a layout that really made me excited and mass produce all my cards but over the last couple of years I've been making several different cards as the mood strikes until I have all 40 or so cards that I need.  The above card was made using green cardstock, starry vellum paper, some silver twine, blue cardstock, and then my image was stamped on white paper.  I then colored in the globe with marker and put crystal effects on the whole thing to make it 3-dimensional and shiny. 

  This card is my favorite (sorry the picture isn't the greatest-- we had quite a few dark, gloomy days around here).  I liked it so much I made three different versions using different shades of blue paper for a total of 12 or so cards.  I used blue paper for the card and made sure I had enough extra scraps to cut out a backing for my snowflake stamped image so that they'd match.  I had some snowflake vellum paper and used clear tinsel ribbon from Stampin Up! to embellish the card.  I stamped my snowflake image on white paper using embossing ink.  I then used heat and stick powder and sprinkled the entire snowflake with Dazzling Diamonds glitter from Stampin Up!


   I loved the simplicity of this card.  I'm not usually a simple card kind of gal and tend to lean towards the more is more philosophy but once I finished this card I really loved it.  It's another card that I ended up making a dozen or so of in a variety of blue shades.  I used my snowflake punch from Stampin Up! and punched out a white snowflake.  I added a rhinestone gem to the end of each "arm" of the snowflake and stamped my sentiment "the little things" in Whisper White craft ink. 

Monday, March 17, 2014

Oh boy, oh boy!

  I had another baby shower this weekend so, of course, I made another scrapbook album.  Really it's at the point that if I'm going to any sort of shower I'm making a scrapbook just because that's what's expected and I feel like I'd be letting the bride to be or mommy to be down if I didn't made one!  That said I had so much fun creating this album.  They knew they were having a little boy and the nursery theme and shower theme were both safari so that made it extra easy.  I used my Cricut quite a bit and scoured almost all of my cartridges for anything "baby" themed.  I also used up a lot of my baby boy/ animal papers up that I already had lying around the house (though I couldn't resist buying a few new ones too!) 
   
Dreams come true page-- perfect for ultrasound photos

I took the title for this Baby Shower page right from her invitation!

He's finally here page complete with name, date, height and weight stamp

A sweet baby boy page

Splish Splash page made using my Cricut and some crystal effects and lots of rubber duckies!

Winnie the Pooh nap/ sleep page

Baby boy page

Hanging out with my family-- double page spread

What boy album is complete without a page of trucks?

Snakes and snails and puppy dog tails... that's what little boys are made of!

Baby's first (or favorite) food page

A little Monkey Business!

So sweet!

I love how this baby milestones page turned out!

You're a hoot page

How cute is that?

Friday, February 28, 2014

Breakfast with Friends... Disney friends

   I've  been working on these Lilo and Stitch pages for three days.  I'm not sure why it's taking me so long but I finally finished a few of them! 


I think this one is my favorite!  Alec only wanted to meet Lilo and Stitch since he had already met
Mickey and Pluto at Chef Mickey so I didn't have a ton of photos with him in it.  I was
able to assemble a single page for his book.  I had this brown sandal/ flower paper and I loved
the colors in it.  I mounted each of the photos onto blue and then orange.  Once assembled on my page
I added a blue title cut from my Life's A Beach cartridge.  I cut two more titles in orange and gold to get
the layers for the flower on the title.  I then cut three flip flop boarders out of blue, orange and gold also to get my flip flop embellishments.  I also cut two Plumeria flowers; one orange and one blue and then used the layers feature to cut out the gold and orange and blue enhancements.  Once I had assembled all the flip flops and flowers and had them on my page in a
way I liked I went through and added a bit of shading using my two way markers.  I love how much they pop now!
 
Evan's Lilo and Stitch page looked adorable with the bright sunshine paper behind each of the pictures that I layered on the orange paper.  I cut a gold bar to go across the photos at the bottom and used the From My Kitchen cartridge to cut out the breakfast title in orange.  I finished off the page with a few Lilo & Stitch stickers.  

I was not happy with this double page spread but could not figure out what else to do with it.  I had given up on it and put it into the album when inspiration struck.  My Life's a Beach cartridge was out & the book was open on my desk.  I noticed that the picture showing was the same leaf as the ones on Lilo's dress.. 

so I cut out 8 white leaves in a size 3 and tucked them in among the photos and stickers.  I LOVE the page now.

Thursday, February 27, 2014

More quick and easy Disney pages

     This weekend I worked on our Disney album some more (not the pictures from a few years ago but the ones from September).   I had put these pictures on hold while I caught up on other scrapbooking projects that I had piling up.  I worked on our Dumbo pages.  My two younger children agreed to ride Dumbo with me and we snapped some great pictures that day.  I made up three pages; one for our family album and one for each of the boy's albums.  I had one sleeve of Dumbo themed stickers that I had bought a few years ago and I combined them with some printed papers.  My favorite is the top layout.  I love the contrast between the white and the dark royal blue paper and I think all the tiny boxes along the bottom are just darling.    I also pulled together one really quick teacup page. 


For this layout I mounted all the photos onto white paper and then backed them with a dark royal blue color.  I had enough left over to make the title strip and used my Stampin Up! phrase starters stamps and my Almost Amethyst pad to print the title.  I tied a bow around the bottom of the page and added 5 small boxes (2x2") along the bottom putting just a sticker or two or in each box from the Dumbo sticker set. 


I'm not sure why the colors came out so weird in the photo but I used the Disney scrapbook paper that was preprinted with Dumbo, Huey, Duey and Louie.  I mounted my photo on some matching cardstock and used the rest of that cardstock and my Animal Kingdom Cricut cartridge to make the title.  I embellished the title using my white marker. 


For the last Dumbo page I used some circus paper. I found some red cardboard letter stickers to make my title and mounted my photo on dark red cardstock.  I used my last few remaining Dumbo stickers to finish off the page.

I used a blue paper for my background paper and pulled in some dark rose paper that I cut into a smaller square to hold my photos.  I cut a printed light green paper to hold my journaling and added a large Alice sticker.  I cut out the Tea Party words using my Wrap It Up Cricut cartridge and then I finished off the page using two little sticker teacups that had come with the Alice image. 

Friday, February 21, 2014

Disney scrapbook pages

  I finished up my last Disney page from our 2012 trip this afternoon and I am so happy that I am done!  I really like the way the majority of my pages came out and I love how much I've been learning about my Cricut.  I have read many books and magazines about the Cricut but I find that, for me, the best way to learn is to experiment with it.  I took some photos of these final pages but I must warn you; the pictures are pretty awful.  I was so disappointed in how they came out since the pages look pretty amazing but we've had lots of dark dreary weather here lately and I had to rely on a variety of lighting and the camera flash (neither one of which I find works well on photographs!).


Snacking at Disney

    My boys love getting sugar sticks at Disney.  On this particular trip they actually got a few and colored their teeth and mouths so much so that they created quite a stir at a parade!  I had to scrap these memories but I wanted to keep it very simple.  I mounted the photos onto some blue paper and arranged them horizontally across my printed background paper.  I took a small strip of yellow paper and then using my From My Kitchen cartridge I cut out the word candy in blue and backed it with a lighter shade of yellow paper.  

Maharajah Jungle Trek
      Using the Animal Kingdom cartridge I cut out a large bright blue title and added a few embellishments to the title using my markers.  I cut out the tiger using the "Flip" button.  Once the tiger was all cut out I added some details with the markers I also added some shading using a sponge and my mustard colored stamp pad. I then played around with how I wanted my photos arranged and ended up mounting them on both the burgundy and the blue paper.  I felt like I needed to balance the yellow of the tiger so I added a strip of the same color paper under my title. 


Hollywood Boulevard Dancing


      We were lucky enough to be at Hollywood Studios on a day that they were shooting a live flash mob scene.  While I refused to move from our prime parade viewing spots (front row on the curb) I encouraged the rest of the family to join in while I saved our spots.  They had so much fun and I had a great time snapping pictures.  For this page I mounted the pictures on dark red paper and left a large journaling spot.  I cut out the title and the six small stars using my George and Basic shape cartridge and then adhered everything to a light blue and red starry paper.  Easy peasy! 


       I really struggled with this parade page.  I still don't love it but I was happy enough with it by the time I declared it done.  I had a lot of pictures I was trying to incorporate onto the page and I cut them out in various sized ovals and circles and then mounted them on yellow paper.  I then played around and around and around trying to get all the circles and ovals to fit.  I struggled a bit and ultimately ended with this layout.  I found the stickers in my stash of embellishments and then added the title that I cut out from the Cricut.  


Disney's Celebrate Parade-- we caused quite a stir with bright blue teeth and tongue!

          I had a really hard time with this two page spread; mostly because I was trying to cut out six different figures using the Cricut and it took me forever! (as you see I ended up deciding not to finish the last two!).  I cut Mickey, Minnie and Chip from the Mickey and friends cartridge (and I can tell you that all of these characters were cut at a size 3).  I really wanted to draw attention to the photo of my son and Drizella but I don't have any embellishments of the ugly stepsisters, just Cinderella.  I finally decided to take the Snow White image and modify it slightly.  It still looks a bit more like Snow White than I would like, but that's OK.   I used a corner rounding punch to round all the corners of my photos and the mattes then I adhered it all to my two pages leaving a space in the middle for my Celebrate! title that I cut using the Plantin cartridge. 


  My final page was our Phineas and Ferb meet and greet page.  I was stumped as to what to do since there aren't any Phineas and Ferb embellishments or anything anywhere!  I finally settled on a giant tree.  I used my "Just Because" Cricut cartridge for the tree and after a few attempts found a size I liked (this was a size 5).  I  mounted my photos on purple paper, tucked a large blue circle behind them and adhered the tree on top of the circle.  Using my SpongeBob cartridge I cut the title Out of white paper and used my marker to add some color to it.  I thought it was perfect that it looked like a cloud and sun and fit in nicely with the tree but it was also fitting that the Phineas often says "this was the best____ ever!"  (I know because I looked up catch phrases for Phineas and Ferb!)
   

Tuesday, February 18, 2014

Finishing up our old Disney trips

    It's so funny how we go through stages (or at least I do!) in my scrapbooking.  I look back a the very early "first" scrapbooks I ever made and I really don't even like them.  The craft was just starting out and so was I, supplies weren't nearly as abundant or as varied and the pages look kind of blah to me.  Just a few short years ago I was definitely in a Jolee's faze.  Every page had a great three dimensional Jolee's sticker with some ribbons and buttons and lots of texture.  Now I am definitely in my Cricut faze.  I am having so much fun using this new tool that I can't even seem to break from it!  I have a huge pile of stickers and embellishments but I find I only turn to those now when I can't find anything appropriate on the Cricut.  I have been trying to do better at merging the two and think I came up with quite a few pages that are just adorable using both sticker embellishments and Circuit cut outs.  I have been scrapping away and have just been to busy to share (plus some of it has been done as a surprise and I don't want to ruin that!).  I thought I'd do a looong post catching you all up on my many Disney pages that I've been working on. 
   
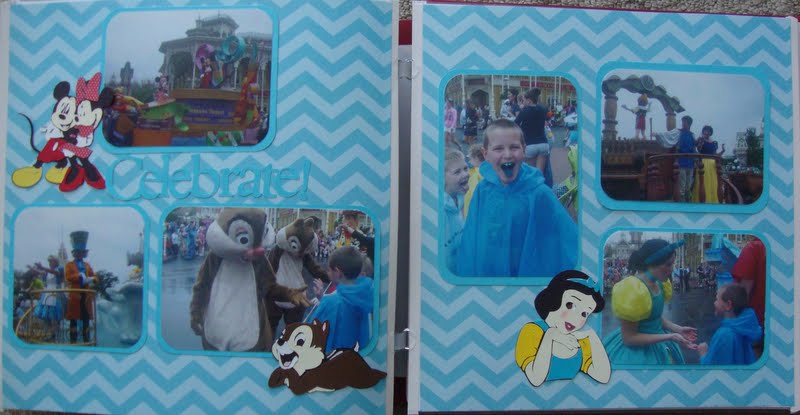
Hollywood Studios Speeders

     For the Star Wars Speeders page I had some left over Star Wars paper and stickers from a Star Wars scrapbooking kit I bought a few years ago.  I mounted the photos together on to green and then a light blue paper and before mounting it all onto the page I used my punches to cut out a few small niches for the stickers I had planned to use.  I centered the pictures on my page and put the three green stickers near each niche.  

Hollywood Studios-- Darth Maul page

    My sons are obsessed with Star Wars and my oldest just HAD to have his face painted like Darth  Maul.  We built the matching light saber at Star tours and I knew I had a scrappin' moment to remember.  I mounted my two photos onto some dark grey paper and put them together in such a way that the corner of the big photo hid a few distractions in the smaller photo that I had been unable to crop out of the picture.  I used printed maroon paper for the background and some black sticky netting that I had gotten from Stampin' Up! years ago.  I used a few remaining Star Wars stickers and added some brads to make them really pop.  


Magic Kingdom-- Teacups page
           I used my Best Of Disney Classics Cricut cartridge to cut out the stack of teacups for the corner of the page.  I cut every layer out of a different color to get the different colored cups.  I used the same color papers and my Doodletype cartridge to cut out the title: spin and spin and spin. 
I mounted all photos onto blue cardstock and used a printed background paper with all the colors in it to pull the whole page together. 


  I loved how this Splash Mountain page came out!  I combined two different Cricut cutouts to make the mountain.  I used a cartridge called H2O to make the waterfall and the title.  I enhanced the waterfall with my white chalk pen from Stampin Up!  I then cut the mountain out of the paper doll dress up cartridge.  I had to cut a few mountains before I had the right size to match up with my mountain.  Since there was some blank space at the bottom of my mountain I filled it in with matching blue from the waterfall.  With the mountain complete and on my page I mounted all the photos onto brown paper and arranged them until they looked just right to mw.  


   I was of two minds with trying to scrap Kali River Rapids... keep with lots of circles and blues or cover the background with mini flags using my flag punch.  If you've ever been on the ride you'll probably remember seeing lots of small fabric flags all around and I liked the idea of keeping with that setting.  However I couldn't resist using my new Cricut cartridge and once I got started I just loved all the circles and blues with some pops of orange.  I mounted all the photos onto orange paper and set them in the middle of the page.  I then used my Cricut Keystone to cut out the title in blue and orange.  I used my Cricut Accent Essentials to cut out various circles in shades of blue and orange.  I played around with the various circles and title letters until I had a layout I liked and then adhered it all into place.  

Kilimanjaro Safari ride at Disney's Animal Kingdom

  I had some printed animal paper to use as the background for my Kilimanjaro Safari ride page.  I had 5 photos for this page and if you look closely you'll notice the middle photo is actually a pull out.  I took a green 12x12 paper and cut it in half then folded it in thirds accordion style.  I put the pictures on and then using my adhesive put a small ribbon pull on the top so you can pull out all the photos to look at.  I then mounted the folded photos onto a slightly larger piece of brown paper and put photos on the top and bottom.  using the same green paper I cut out my title using the Animal Kingdom Cricut Cartridge.  For one final touch I cut out the giraffe (from the same cartridge) and colored in the dots, hooves, and antlers using dark brown marker.  

Primeval Whirl-- Disney's Animal Kingdom

     My middle son, who hates roller coasters, fell in love with this little rollercoaster at animal Kingdom.  I knew I had to scrap this bit event!  I had tons of great photos since we rode Primeval Whirl at least a half dozen times (in a row!).  The challenge I typically have with scrapbooking is that I want to cram all of my photos onto one page and it's not always easy to fit them all.  I decided I really only needed two full size photos for this page and cropped the three other pictures into some nice small circles.  Once everything was mounted on green paper the small circles seemed to fit nicely on the side of the page as accents.  I used my Paper Doll Dress Up Cricut cartridge to cut out he volcano and the palm tree.  I drew the stem from the volcano onto the page using a marker and found these adorable dinosaur stickers in my stash of stickers.  I loved the added effect of the googlie eyes.  I'm such a sucker for those!  To finish off the page I cut out the title from the Plantin Schoolbook cartridge.   

Hollywood Studios -- Muppets

  My boys are not big fan of the Muppets, but since I am I always make them pose near the fountain and go see the 3-d show at Hollywood Studios.  As you can tell, they don't always love it, but I just loved their faces and decided I needed to scrap this photo.  I was at a loss for this page until I stumbled upon the Kermit the Frog stickers today at Michael's.  The page was put together in no time after that!  Using orange, maroon, and a printed paper with shades of orange, red and yellow, I mounted the photos and made three huge boxes for the stickers down the side of the page.  I offset the two Kermits with the megaphone and microphone to keep things balanced and decided to carry the green color over onto my title.  I used the George and Basic Shapes cartridge for the title.  Simple and sweet.  

Hollywood Studios-- Honey I Shrunk the Kids Playground

     Hm... I thought this page looked so much cuter in person!  On here it looks pretty plain.  I used a printed orange background page and mounted all the photos on some green background paper.  I cut out some grass from the Sports Mania Cartridge and trimmed it around the bottom photo.  I then used some dimensional bug stickers to add to the grass and used the title "our Adventure" from the same sticker pack.  The bugs are several layers thick so they stick off the page a bit and they have googlie eyes too and I thought they went perfectly with the giant ants and spiders we saw at the Honey I Shrunk the Kids Playground.  

Video game junkie

     While not technically a Disney page, since it doesn't have any rides or attractions, this was most definitely a Disney page for my family.  What other kid goes to Disney and spends more time on his DS than he does looking around?!  My middle son doesn't like many rides, he doesn't like anything that gets dark, goes fast or might scare him, and so we have started letting him carry his video games all around the park.  He often uses it while waiting for his brothers to get off the rides and once or twice we were able to cajole him onto a ride with the promise that he could play his video game the whole time and not have to look up at anything scary (Pirates of the Caribbean comes to mind-- though we always made sure he wasn't disturbing anyone else around us).  I pulled this page together very quickly.  I mounted all my photos onto green paper and cut it out into a large rectangle.  I then mounted that onto some white paper and put all of that onto my blue background paper.  Using my paper scraps I cut out the words Game On from my Sports Mania Cartridge.  I then found the video game controller image on my Wrap It Up cartridge.  

Disney's Polynesian Hotel-- O'hana

  My final page, it not my favorite. I'm still working on a way to improve it...  I found printed background paper with lots of the Hawaiian flowers on it so I just mounted my two very similar pictures onto some paper and put them in the middle of my page.  I then used my Life's a Beach cartridge to cut out the title Tropic Punch and the accompanying flower.  

Wednesday, February 12, 2014

Valentine Cards

     It's funny; I got into paper crafting because I really enjoyed making my own cards.  I stumbled upon Stampin Up! fairly early on and loved learning all the new stamping techniques, acquiring new card making tools and naturally progressed into scrapbooking as it became popular.  I now find it almost difficult to come up with cards.  I don't think it's so much the lack of ideas as it is a general laziness towards making cards.  I don't tend to enjoy card making as much as I enjoy scrapbooking and so when faced with a bunch of cards I need to make I usually opt for a simple, easy design that I can whip up fast.  All four of these cards were made in an hour this morning.  I was under the gun to make all my valentine's for my guys and I'm pretty happy with the cards I came up with (sorry, the photos aren't really the greatest).  They're a bit more "girly" than I'd usually make them since I used pinks and hearts and flowers but hey, it's valentine's day! 
     

   Using a large sheet of dark pink paper for the card background I used a lot of black to accent my layers and make it a bit more manly.  I found black checkered ribbon for the bow and then just layered black, white, black, and pink paper stamped with my rubber "I LOVE YOU" stamp.  I added a few embellishments to the hearts using tiny stick on rhinestones. 


   Using the other half of the pink paper I made the second card.  I found several scraps of pink patterned paper in my pink scrap bin that all coordinated really well together.  I mounted each one onto a piece of black paper and set them down on my card front re-arranging them over and over again until I had a design I liked.  I then used a small square of white paper and stamped my frog image in black ink.  I colored the image in using my markers and adhered it to the smallest pink square.  The sentiment inside reads "have I toad you lately that I love you?"


    I used red paper for the background this time and ran the card through my Big Shot using a fancy flower embossing plate.  I cut small semi- circles out of the two sides of the card for my ribbon to thread to and used double sided tape to hold it in place.  I then stamped my words onto white paper, mounted them onto a patterned red paper, then onto black and back onto white.  I placed the multi- layered sentiments onto the center of the card and added a few more sticky rhinestone embellishments the card between the letters L O V E.


  For the final card I used the remaining red paper for the card and placed a slim black ribbon at the top of the card, tying it into a bow.  I stamped my heart image (twice) onto a long strip of white paper and trimmed it to fit my card.  I then mounted that onto patterned red paper and then a thicker strip of black paper.  I used my markers to color in the hearts and backgrounds and attached the whole thing to the card front.  

Saturday, February 8, 2014

Really Cranking Now!

  I'm really making headway now!  I got 6 scrapbook pages done today; I was a scrappin' machine!
  

    My boys were thrilled to meet Lightning and Mater but since I don't own the Disney Cars Cricut cartridge I had to think a bit more creatively for this page.  I found the title "A Need for Speed" on the Sports Mania cartridge.  I found the trophy on the Everyday Paper Dolls cartridge.  Once I cut them both out of some dark yellow paper I mounted my two photos on red and white paper and then assembled everything onto the page.


  I had just gotten my Stampin Up! order in last night and thought the mini flag punch would be perfect for this Tomorrowland Speedway page.  I filled in the blank orange spaced with some fun "road" stickers from a Lightning McQueen set I had. 


    I think the pages I struggle with the most are the ones that have tons of pictures.  I don't like busy/ messy pages and I'll be honest and say I think that's what I ended up with!  I don't like this two page spread; I probably should have used plain background papers instead of printed but I'm not sure I would have liked that much better.  For this two page spread I used two sheets of Mickey printed paper and mounted all the photos onto black paper.  I used black paper for the journaling box and the title as well.  To make the stickers POP I mounted them on black paper too.  I just think the page detracts from the photos rather than accents the photos but every now and then I find I really don't like a scrapbook page no matter how much I keep working on it and usually I end up just letting it be.  I guess you can't LOVE everything you create. 


   The boneyard is one of my oldest sons favorite parts of Disney.  He loves to dig in the sand and what fun to be able to uncover a fossil!  I found these great fossil stickers and thought they were just the perfect thing for the boneyard page. I mounted my photos on a printed gray paper, mounted all of that on some white paper and them set that upon another printed gray paper.  I put the three stickers along the bottom of the page and cut the title out using the Cricut.  I even left a small box for some journaling. 


 Using some fun firework paper I quickly pulled an IllumiNations page together without using any embellishments.  I just didn't feel like the page needed anything else other than the pictures and the title.  I used blue glitter paper for the picture's background and plain white paper for the title.  Simple! 

    This test track page was very simple-- I used gray background paper, a large sheet of mustard paper behind the photos and then mounted each photo on black.  I played around with the arrangement of photos for a while and filled in the "black" spaces on the yellow paper with checkered Mickey heads.  I had checkered paper and used the Mickey and Friends cartridge to cut out the Mickey heads.  I then used one of the alphabet cartridges to cut out the title using the same checkered paper.